
Welcome to the ultimate space warfare experience. As a pilot in SpaceCorps, you will represent your chosen faction to battle for galactic dominance, gather precious resources, and build your prestige in the universe.
Core Resources
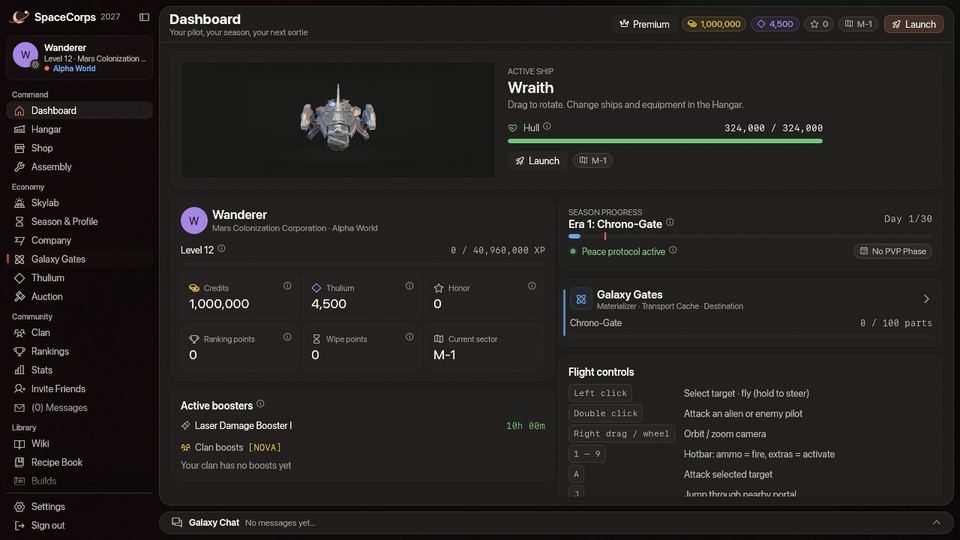
To survive and thrive, you must manage two currencies and keep an eye on your Honor. The materials you build with are on the Resources page, with where to get each one and what it is for:
- Credits: The primary standard currency, paid by every alien you defeat and by finished missions, and made by the Credit Farm of your Skylab. Used to buy basic gear, ships, and standard equipment.
- Thulium: The rare radioactive ore and high-value currency, paid by every alien you defeat and by finished missions, and made by the Thulium Farm of your Skylab. Used to purchase elite weaponry, engines, hybrid shields, and powerful booster packs, to upgrade modules in the Assembly, to change company (5,000), to boost the Research Centre (5,000) and for every jump of a Jump CPU (500).
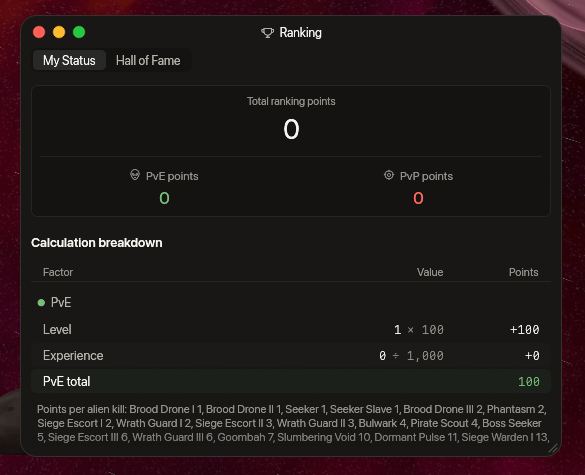
- Honor: A score, not money: a measure of your loyalty and standing. Honor does not set your rank, which comes from your PvE points of the season and, for the six best ranks, from the places your company has, and attacking friendly pilots from your own faction will heavily penalize your Honor rating: destroying a pilot of your own company, a player's ship or one of its Company Pilots, costs 100 Honor. So does hitting one in the 15 seconds before something else destroys it: softening up a company mate for an alien to finish costs as much as the kill. Killing a company mate is no PvP kill and earns no PvP points. Changing company takes half of your Honor, rounded down; an Honor of 0 or less stays as it is (Changing Your Company).
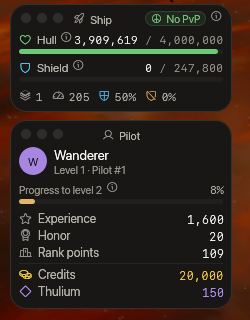
In the station your Credits, Thulium and Honor sit in the top right corner of every page, beside your sector and the Launch button. When the window is too narrow for a long amount it is shortened (987.7M); point at it to read the whole number.
Pilot Profiles
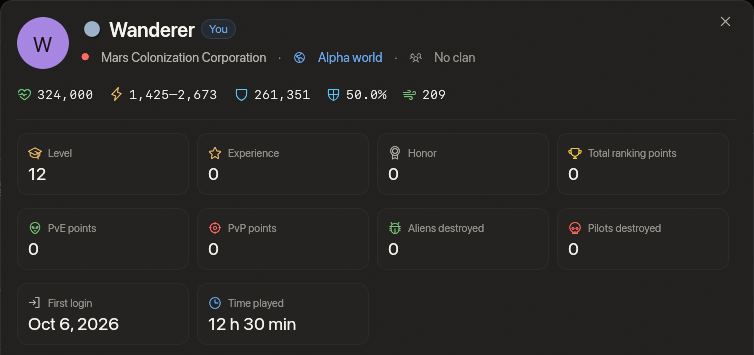
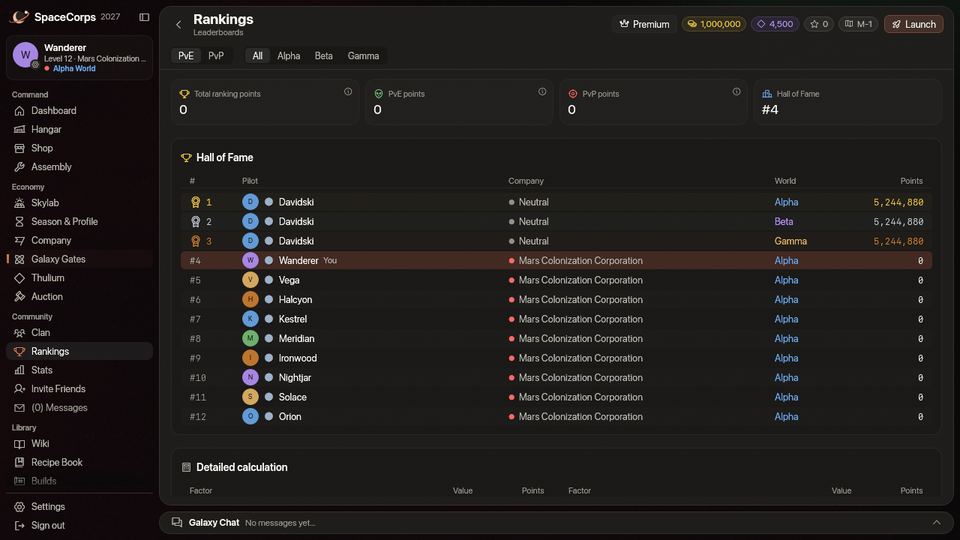
Click a pilot's name in the Hall of Fame (Community › Rankings), on the Stats page or in a clan's list of members and the pilot's profile opens: company, world and clan, level, experience, honor and ranking points, the aliens and pilots the pilot has destroyed, and the ship they fly with its numbers. Two tiles say how long the pilot has been around:
- First login. The day the pilot first signed in, as a date in your own time zone. A pilot who played before 0.4.12 shows the day they first signed in since that update, and a dash stands for a pilot who has not signed in since.
- Time played. How long the pilot's game has been connected to the server, in hours and minutes ("128 h 15 min", "45 min"), in flight or at the station. Time spent standing still counts too. Counting began with 0.4.12, so for a pilot who played before it, it is the time since that update.
Both are public, like level and rank: any signed-in pilot can read them on a profile. The season's wipe does not reset them.
Beyond your profile, Community › Achievements keeps your career goals, with their rewards and titles: see Achievements.
Changing Your Company
You choose your company the first time you play, and that is free. Later you can change it in the station: Economy › Company shows the other two companies, each with a Change company button. A change costs 5,000 Thulium and half of your Honor (rounded down; an Honor of 0 or less stays as it is). Your ship is repaired in full and you move to the home sector of your new company (M-1, T-1 or G-1). Your clan, your group, your ships, your items and your Skylab stay as they are, and your missions go on: their officers are now your new company's, and a rival x-4 task means the other two companies' border sectors (see Quests). Your PvE points go with you, and your rank is worked out again among the pilots of your new company, with the places it has. You cannot change company while your ship is in flight: dock first.
Playing With Friends
Join a Clan or fly in a Group of up to ten pilots, and bring new friends along with your personal code: Community › Invite Friends gives them a starter pack and you a Thulium reward when they reach level 5. See Invite Friends.
Missions
Missions are the fastest way to level up. Open Mission Control from the toolbar (inside a station's safe zone) or by clicking the Mission Control bubble that floats above the station: 88 missions take you from level 1 to 8, ten a level in any order plus a Special that opens when the ten are done. Most are short chains: destroy a few aliens, fly to a point, stay in a sector for a few minutes, or find a quest item that drops only for you and drive it home to Mission Control, sometimes with a rule such as "lose no more than 3,000 hull" or "do not die". Each level's missions lead you one sector further out, from your base to the border and the PvP centre. From pilot level 3 a separate Challenge line of fifty very hard missions in five tiers pays large rewards, by the work: every kill is worth more in each tier, up to a ceiling of 200,000 Thulium a claim. The printed numbers are the base, and your world, boosters and clan boosts multiply them, as for every mission. See Quests for how they work and what every mission pays.
Travelling
You travel between maps through portals: fly within 500 units of one and press J, and three seconds later you arrive at the matching gate of the next map (Spacemap Travel). Your base x-1 has one gate, to x-2; from there the maps lead on to x-3 and to the border x-4, which opens on your Danger Sector, the PvP centre. Every x-4 also has a gate to the x-3 of the next company, and every x-3 has the gate back: Mars M-4 to Terra T-3, Terra T-4 to Galactic G-3, Galactic G-4 to Mars M-3. These three links make the ring, a way between the companies' maps that does not cross the PvP centre.
Dying and Coming Back
When your hull reaches 0 the ship is destroyed and the death screen asks where you want to come back. Three places are always listed, and you choose with a click or with the keys 1, 2 and 3 (the choice opens three seconds after the explosion, so a key you were pressing in the fight picks nothing):
| Choice | Key | Where you appear | Locked after use |
|---|---|---|---|
| At base | 1 | Your company's base in your world (M-1, T-1 or G-1), inside the station's safe zone, wherever you were destroyed. | Never |
| At the nearest portal | 2 | Next to the portal of that sector that is nearest, in a straight line, to the place you were destroyed, 150 to 300 units from it. A sector with one portal uses it. A sector with no portal (the neutral sectors) greys this choice out. | 3 minutes |
| On the spot | 3 | The place where you were destroyed, in the same sector. Not offered in a Danger Sector (see below). | 5 minutes |
- The lock starts when you respawn with that choice, not when you die, and it belongs to that choice alone: using the portal does not lock the spot. A locked choice is greyed out on the death screen with a countdown (minutes and seconds) and opens by itself when it runs out. The locks are kept by the server: logging out and in does not reset them. A new season (the wipe) does.
- A choice the server refuses costs nothing. If a choice cannot be used (still locked, no portal in the sector, you changed world since you died, or the spot after a destruction in a Danger Sector) the lock is not spent and your ship is not moved; you pick again.
- Spawn protection. Whichever place you pick, your ship cannot be damaged or locked on to for 3 seconds after it comes back, and aliens lose interest in it, so whoever destroyed you cannot destroy you again at once. The same 3 seconds, you cannot attack: a laser or a rocket is refused with a notice, and the protection does not end early. The HUD shows the seconds left. It ends when they run out.
- Danger Sectors (
DS-1toDS-4): no coming back on the spot. If you are destroyed in a Danger Sector, in any world, the death screen offers only your base and the nearest portal: "On the spot" is listed greyed out and says it is not possible there. Asking for it anyway is refused, and a refusal costs nothing (no lock starts, and one that was running is left as it was). The portal is that of the Danger Sector you were destroyed in, nearest to the place you were destroyed; it works as everywhere else, and so does the base. Where you were destroyed decides, not where you are saved: the next destruction on an ordinary sector offers the spot again, unless its lock is still running. - The black hole and the other hazards. The ring of radiation of the black hole (4,200 units from the centre of Danger Sector 4), the radiation of an overheated giant excavator and the zone of the Dormant Swamp are all in Danger Sectors, so none of them can bring you back inside itself: a respawn at the portal is kept outside them too, and a pilot who logs in inside one is put outside it.
- Your hull comes back capped. You return with your ship's hull up to 10,000 and an empty shield, whichever place you pick. A Protos (8,000 hull) comes back full; the bigger ships (the Kitefin's 24,000 up to the Ironclad's 500,000) come back with 10,000, so repair before the next fight with a Repair Drone or an Emergency Repair (see Combat and Abilities). The shield recharges as usual. The death screen says so.
- What a destruction costs, besides that: you lose no items, and the choice only decides where you appear. Your abilities are ready, and you come back uncloaked and out of any EMP window. You stay in your group.
- Docking. "Return to Base" on the death screen brings you back at base, as always, with the same hull. If the game closes before you choose, revive the ship for free in the Hangar; you are at your base, with the same hull and no shield.
Keyboard Controls & Keybindings
SpaceCorps supports customizable keyboard layout controls (accessible via the in-game Settings panel). Below are the default keybindings:
| Action | Control / Keybind | Description |
|---|---|---|
| Move Ship | Left Click on Spacemap | Directs your ship to fly to the clicked destination coordinates. |
| Turn and Zoom the Camera | Right Drag, Mouse Wheel | Right drag turns the view around your ship; the wheel (or a middle drag) zooms in and out, from 30 units away out to 1,500, which shows about 4,400 by 2,650 units of space (2.25 times the area of a 1,000-unit view). Your turn and your zoom ease back to the resting view two seconds after you let go, unless you switch on Camera stays where I put it in Settings › General: then the view keeps the angle and distance you gave it (the Reset view button next to that switch puts it back at the resting view once, and so does switching it off). Camera Zoom in Settings › General sets the resting distance, from 50 % to 338 % (150 % is the default); with the switch on, moving it takes the camera to the new distance. |
| Select Target | Left Click on Entity | Selects an alien, enemy pilot, or portal as your active target. The Target window (see below) shows its name, distance, hull and shield. A click on an asteroid selects it without changing your target; rockets break it, and your lasers hurt it a little. |
| Attack Selected Target | Key A (or Ctrl + Click) | Starts firing your lasers and rockets at the selected target. With no ship or alien selected, it fires your lasers at the selected asteroid. |
| Fire Rocket | Key R | Fires the rocket you launched last (or the first on the hotbar): a guided rocket at your selected target, a straight one toward your cursor. To aim a straight rocket with the mouse, click its hotbar slot to arm it, then click in space. All rockets share a 3 second timer (a drone formation can change it). |
| Jump Portal | Key J | Starts a jump when you are within 500 units of a portal (inside its safe zone). The jump takes 3 seconds (a bar over the hotbar shows it) and you must stay in range until it is done. In the Danger Sectors you cannot start one while you are under attack. |
| Swap Configuration | Key C | Swaps between Config 1 and Config 2 (swaps active lasers/shields/speed setup). |
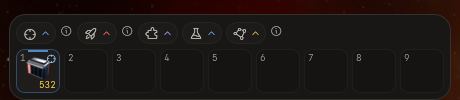
| Primary Hotbar | Digits 1 - 9 | Activates items/actions in your primary HUD hotbar slot (e.g., ammo, repair bots). You can also click an item in a picker above the bar (Ammo, Rockets, Extras, Consumables or Formations) to use it with no slot and no key: it does what a click on its slot does. Drag it onto a slot to keep it there. |
| Secondary Hotbar | Shift + Digits 1 - 9 | Activates items/actions in your secondary hotbar slots. The row shows above the primary one once it holds something; open the Ammo, Rockets or Extras picker (or drag a slot) to place an item there. |
| Drone Formation | the key of its hotbar slot | Wears the formation on that slot. Drag it there from the hotbar's Formations list, which also has Standard, no formation. You may change once every 2 seconds, in a fight and in a safe zone alike; the slots show the seconds left. See Drone Formations. |
| Fullscreen | F11 or Alt + Enter (Windows) | Switches borderless fullscreen on or off; the button in the top right of the flight screen does the same on Windows and macOS. These two keys are fixed and don't appear among the bindings you can change. Alt + Enter waits while you type in the chat. |
| Interface Size | Ctrl + Plus, Ctrl + Minus, Ctrl + 0 | Makes the whole interface bigger or smaller (75% to 200%, in steps of 10%) and puts it back to 100%. On a Mac press Cmd instead of Ctrl. The same size is the slider at Settings › Interface › Interface size, and it is saved with your pilot. |
| Choose where to respawn | Keys 1 - 3 | On the death screen: 1 at base, 2 at the nearest portal, 3 on the spot (not in a Danger Sector). See Dying and Coming Back above. |
| Target Window | Key V | Shows or hides the Target window. The first button of the toolbar at the top left does the same. |
| Group Window | Key B | Shows or hides the Group window: your group's ships, hull and shield. While a group invitation waits, Y accepts and Escape denies it. See Groups. |
The Target Window
Click an alien or a pilot and the Target window shows what you have selected: its name, its distance, the hull and shield bars, and whether you are firing at it. Its crosshair button starts and stops the attack (the same as A), and the X button drops the target (the same as Esc). With nothing selected it says so in one line. Click an asteroid and the window shows its hull, what it breaks into and how many of your rocket, or how many volleys of your lasers, it takes.
It is a window like the others. Drag it by its title bar to put it anywhere, close it with the red light in its corner or with the first button of the toolbar at the top left (or V), and open it again the same way. Where you leave it and whether it is open are remembered for your account. It starts at the top of the screen, between the two toolbars. Closing it only hides the readout: your target stays selected and your attack goes on.
When the Game Lags
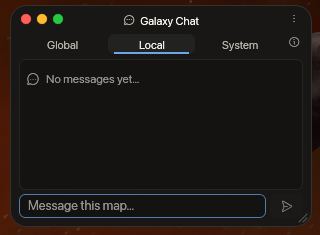
Switch on Settings › Interface › Show network info and a small card appears at the top right (it keeps out of the way of the windows, and it is off until you switch it on). It tells you which side is slow:
| Reading | What it is | Good, slow |
|---|---|---|
| Ping | The round trip to the game server (the icon beside it has three bars when it is good, two when it is slow and one when it is bad; every other reading gets a triangle when it is slow and an octagon when it is bad). | Under 80 ms is good, over 150 ms is bad. |
| Jitter, Snapshot age | How evenly and how freshly the server's updates (20 a second while your window is in front; a window you have left for 10 seconds is sent one a second and a minimised one one every 5 seconds, which the card does not call a stall) arrive. | Jitter under 25 ms and an age under 100 ms are good. |
| Longest gap | The longest time without an update from the server in the last ten seconds. | Over a second is a stall. |
| Server | How long the server's own 50 ms step takes (its 99th percentile). It says n/a when the server is too old to report it. | Under 20 ms is good, over 35 ms is bad. |
| Client | Your computer's frame time (95th percentile). | Under 25 ms is good, over 33 ms is bad. |
When something is bad, one line under the numbers says whose fault it is: Network slow, Network lagging or Connection stalled is your connection or the way to the server, Server busy is the server (a busy server also raises the ping and can hold the updates back), Client slow is your computer (lower the graphics detail), and Client froze means the game itself stopped drawing for a moment (an alt-tab, a minimised window). The same numbers are written to the game's log file once a minute, and at once for a stall, so a report of "it lagged at 21:10" can be answered from the log. When your connection cannot carry all of the server's updates, the server now sends you fewer of them a second instead of disconnecting you: the game gets choppy but stays connected, and the world you see can still be several seconds behind (the Ping reading shows how far). A game of 0.4.23 is also sent the map in a form about 50 times smaller, so a line has to be very slow before it matters. The log also says when each connection to the server opened and closed, and how many updates the server skipped for you.
Quick Pro-Tips for Beginners
- Configurations: Always prepare two distinct setups. For example, use Config 1 with all engines/thrusters in your generator slots for fast escaping or traveling, and Config 2 with shields and lasers for combat.
- Safe Zones: Portals and bases have Safe Zones around them. In these areas, other pilots cannot attack you, allowing you to recover shields or wait out combat cooldowns safely.
- Your first ability: your starter kit already has a Repair Drone I fitted in the Protos' ability slot, so the Emergency Repair button (
E, beside the hotbar) heals your hull over ten seconds whenever it is damaged. See Abilities. The kit also fits a Base CPU I (10 uses, a teleport to your base) and a second Repair Drone I in the Protos' two extra slots. The second drone's REP button is already on your hotbar, in slot 2 (key2), beside your ammo in slot 1; drag the Base CPU from the Extras picker onto a slot to use it (see Extras). The kit also holds one loose Damage Amp I (a laser amp; it is yours to keep and cannot be sold on the Auction): open the Hangar and drop it onto your laser. New pilots only: a pilot who enlisted before 0.4.10 keeps the kit they were given then, without the drone and the CPU, and a pilot who enlisted before 0.5.2 has no Damage Amp I. - Daily Faction Taxes: If you are a member of a Clan, be aware that the clan treasury deducts a tax percentage (0% to 5%) from your daily Credits balance at UTC midnight. Make sure to choose your clan wisely!
- Copy from this wiki: drag over any text in an article to select it and press
Ctrl+C(Cmd+Con a Mac) to copy it; a click on a link still opens the page. Copy page, at the top of an article, copies the whole page as Markdown, to paste into a chat or a note. - Research before you craft: Assembly makes only what the Research Centre of your Skylab has researched. It opens at Core level 10, and the Research page has the technologies, their times and the fuel.
- Drone formations: once you own a drone and have researched and crafted a formation, drag it onto your hotbar from the Formations list and wear it with the key of its slot: a bigger shield for weaker guns, harder rockets for a thinner hull. Each one also gives your drones a shape to fly in. See Drone Formations.
- Plan with the Library: Library › Recipe Book shows, for any item, a chart of what it needs, the steps in order and the full bill with what you own taken off, and Library › Builds does the same for a whole ship, with 15 presets to start from. See Recipe Book and Builds.